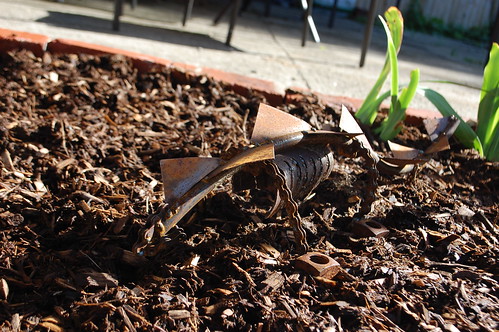
Spike the Tetanusaurus, who I created in a welding class, is currently guarding our flower bed.
Author Archives: Pixel
BlinkenBox
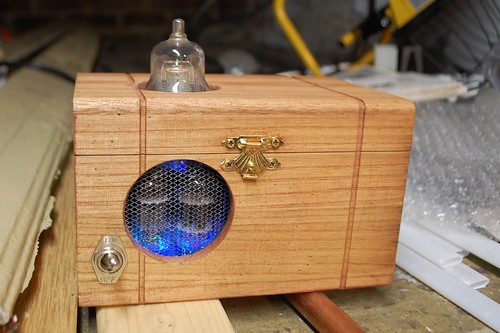
I like to build these little wood boxes studded with vacuum tubes lit by blinking LEDs. I call them “BlinkenBoxes” and they delight me for the simple fact that when you flip the switch they light up and blink, and that is all they do.
A friend has been going through a bunch of difficult stuff recently, and were were going to be getting together with her on a Saturday. That morning I decided to build her a BlinkenBox. So with about three hours before we had to leave, that is what I did. With the time frame I was limited to only things I had on hand, fortunately I keep a lot of random stuff on hand, so I wasn’t lacking for options.
This is what I started with, a simple cheap balsa wood box from a craft store. I bought a few of these a while back with a plan to build a Useless Machine for exactly the same reason I love my BlinkenBoxes, but I never got around to it.
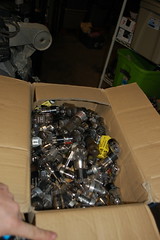 Next up was rooting through my box of vacuum tubes for a few that had the right look. Like many people into steampunk & dieselpunk I love the look of old tubes. I bought this box when I was building Templebot as a huge box full cost only a little more than the few I needed for that project(this same fluke of costs is why I have hundreds of LEDS for a project that needed less than two dozen).
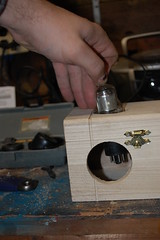 I decided to have one huge tube sprouting up out of the top of the box, and a window on the front with a few smaller tubes behind it. So out came the hole saw and I attacked the box. I decided to make everything off-center both to make it more interesting, and to make at least part of the inside of the box usable to store stuff. As soon as I’d gotten the holes made, I wiped the box down with some cherry stain left over from restoring the floors in our house. Which went a long way to making the box look fancier than it actually was.
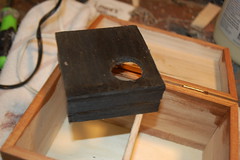 As you can see from how I was holding the tube in the picture above, I needed something to space it up so it would protrude how I wanted it to. Using some scrap balsa I built a small platform that could hold the tube up, and hide most of the wiring as well. Once it was built it was sprayed flat black to keep it from standing out. I also added a divider between the blinky stuff side and the storage side.
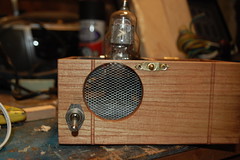 Next up a screen was added to the front “window”, and the switch was mounted. For me the switch is the best part of these, so I use real heavy-duty switches so they have a proper “clunk” feel when thrown. This particular switch was salvaged from my old artcar “Scar” before it was scrapped.
 I wired up the tubes using these excellent LEDs I found on ebay a few years ago. They are RGBs and blink semi-randomly through all three colors on their own. I used the same ones for the tubes in Templebot’s head. The LEDs for the two smaller tubes are actually a bit below the tubes so they would light the whole front of the box, not just the tubes.
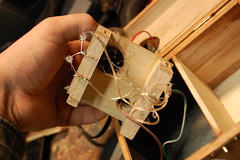 Since I was in a hurry and it was a simple circuit, I use some speaker wire and soldered it together and used hot-glue to insulate the connections. It is ugly, but hidden so it doesn’t matter. Amusingly the only thing I didn’t have on hand for this project was a 9-volt battery. I had to steal one out of a smoke-detector to test the thing, and buy one on the way up to give it to her.
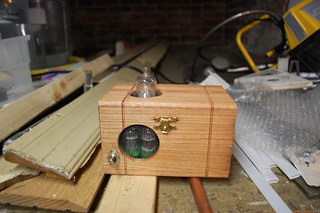 Once it was wired some final tweaks were done (painting the inside of the compartment black, painting the grill from silver to black to make the tubes more visible, adding a divider so the battery wasn’t visible from the front) and it was done.
And when given to our friend, it got exactly the gleeful response I had been hoping for.
Bringing light to dark places
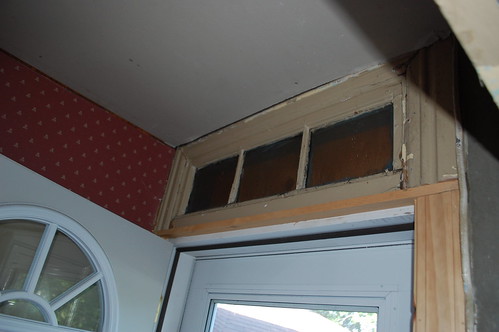 The mudroom in our house is tiny, about 3′ x 3′, and there isn’t a light in there. It isn’t bad now that I’ve opened up the doorway to the kitchen, but it is still dim, especially if you are trying to find something in the closet. I wanted more light in there, but did not want to add a ceiling fixture as the space is so tiny it seemed like anything would overwhelm the space.
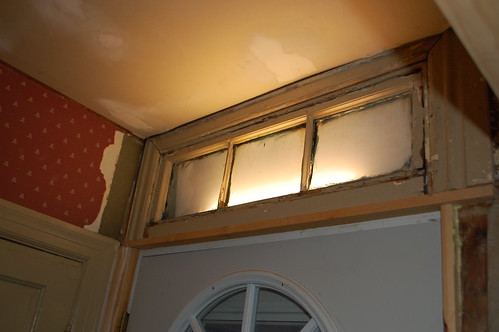
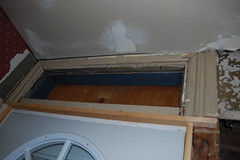 In the mudroom however there is this old transom window. This used to be part of the back door, and was on the outside of the house where it let light into the mudroom. When the prior owners replaced the back door and sided the house, they covered the transom from the outside with plywood, but left it in place in the mudroom. So I decided to use it to my advantage.
 First I pried the transom window out. It had been painted dozens of times and the glass is falling out, but it is still essentially intact. I will be properly restoring it in the future when I start re-glazing all the windows in the house.
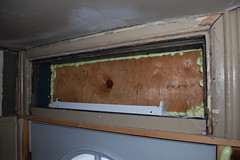 First thing was to seal the edges of the plywood with some spray foam, then I drilled a hole through the side of the transom and ran a wire to where I was rewiring the switch for the outside light. Then I installed a cheap fluorescent light in the transom opening. This light won’t be visible when the transom is in place, so I could use a cheap ($8 w/bulb!) fixture.
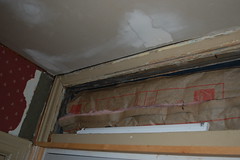 Then some insulation was added behind the light so there would be more than a layer of plywood keeping the heat in here. A piece of white Chloroplast was then added(visible in the next pic) to hide the insulation and help bounce the light out the transom.
The semi-final result is as below. Obviously there is still painting to be done, but you get the idea. The light itself is hidden, so all you can see is the glow shining out of the transom. It does an excellent job of lighting the mudroom, and makes use of an otherwise useless oddity of the house.
A review, of sorts.
(I wrote this a few years ago, however as the machine in question has once again been revived and is just a spiteful as ever, I thought it would be amusing to repost it here)
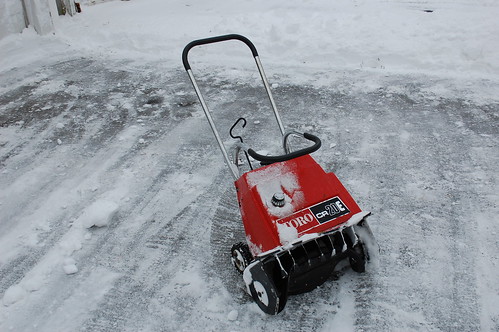
This is the Toro cr20E snowthrower, an early-to-mid 90’s model. It has a 20″ clearing width, a 2-stroke engine and electric start.
This particular version of it is a spiteful machine fueled by gas, oil and hatred. It only runs when the operator despises its very existence. My family bought this thing new, and it was terrible then, an the intervening years have done nothing it improve its disposition. It will fail to start during terrible storms, or develop some malady or another at the point when said malady would be most problematic. If you make the mistake while using it of being glad of it because it is easier than shoveling, it will chose just then to clog, or run out of gas.
Every fall is a fight to fix whatever new and inventive issue(s) it has come up with while in storage. After leaving it behind the shed for at least a year or two in favor of a newer machine, my mom passed it off on me. Whereupon I got to try and revive the damned thing from its slumber, and put it back to work trying out all the new terrible ideas it had.
Parts were replaced or cleaned, things were adjusted, fettling was done and it was convinced to run. This angered the snowthrower so much that the first storm it simply died every time it was asked to move more than 2″ of slush. This resulted in it being thrown across the driveway in favor of a regular shovel.
The 2nd storm of the season (after having the bent axle resulting from said toss straightened) the electric start packed up, and the pull start handle started cracking, lying in wait for an uncareful pull so it could snap in half. Despite these efforts it was manhandled into clearing the driveway, and stuffed back into the garage to plan it’s next assault on my blood pressure.
So if you don’t want to actually shovel your driveway, but want to overwork your heart and keep your heart attack risk dangerously high, this is the machine for you.
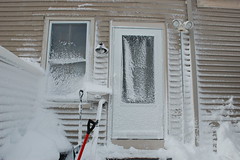
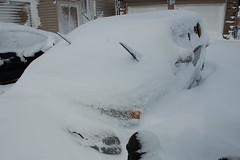
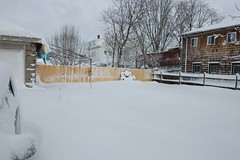
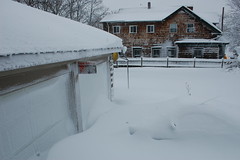
Feb 8th Blizzard, in pictures.
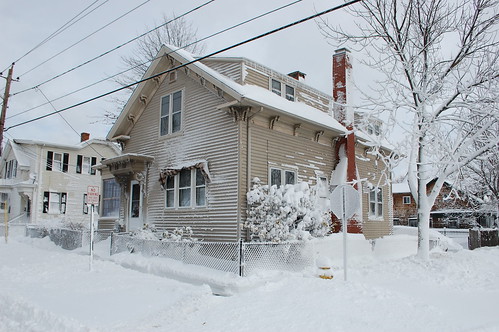
 We, like all of New England, were hammered by a blizzard on the 8th. Snow was falling lightly when I left for work at 8am, and by the time I was coming home(early) at 2pm it was falling pretty fast. Not long after that the wind really picked up and more snow was going sideways than down. Power flickered a few times and finally cut out for good about 9:20pm on Friday. We sat around reading by lamplight, and staying under a blanket to keep warm.
At one point that evening I considered clearing the accumulated snow, however a quick look outside told me it would be a fools errand. The wind was whipping it around so much there would likely be no sign it had happened.
Instead we went to bed early and burrowed under a nice deep stack of blankets & comforters.
The next morning the wind and snow had subsided, but the power was still out. It was also 49deg in our living room.
 We spent the day alternating between shoveling out and keeping warm with pans of boiling water on the stove(thank goodness we converted to gas before we moved in).
Electricity finally returned about 6pm on Saturday. We were without power for 21hours, which was pretty good compared with some people(a co-worker was without power or water for four days).
Stomping around in stilts
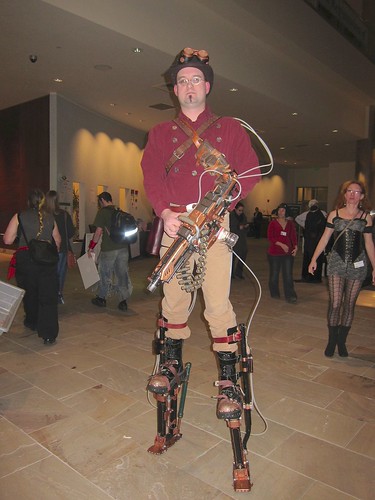
Arisia SF convention was this weekend in Boston. I didn’t make any new costumes or props this year as the house has eaten nearly all my free time & money. But I did get a chance to stomp around in my Steampunk stilts a few times over the weekend.
This has been an ongoing project to build a set of steampunk powered armor. I’ve been adding bits and pieces since I started the project in 2008.
One of these days I’ll do a writeup of the various bits & pieces. But for now enjoy the pictures.
Quick tip, Locking gas cap
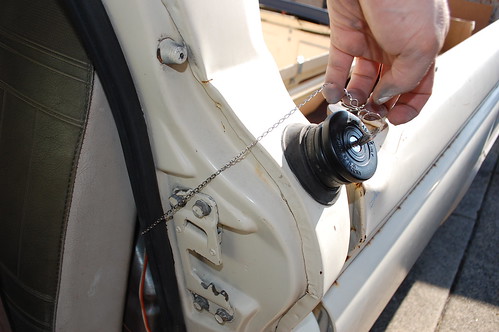
After the gas cap was stolen off the truck on night , I upgraded to a locking gas cap. However I didn’t want to add another key to my key ring, and didn’t want to risk losing it somewhere in the truck.
So I came up with this:
That is the key on a retracting key ring, like what security guards keep their keys on. It is clipped to part of the metal of the cab and is virtually invisible unless you know where to look.
Now when I want to fill up all I have to do is open the door, get out, reach over and grab the key, unlock the gas cap and let go. The key retracts out of the way and I don’t have to worry about misplacing it.
(weird hand placement is due to trying to get a picture with the other hand)
The start of rocker repair on the truck
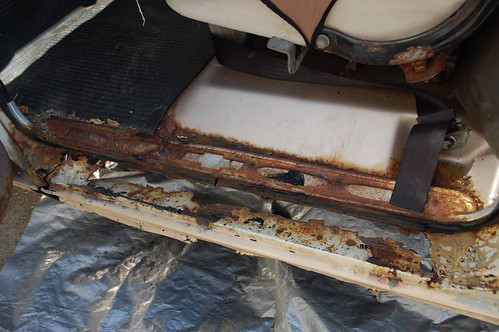
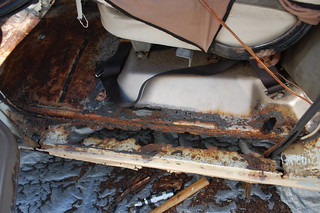
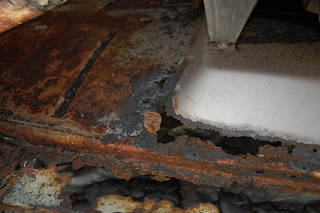
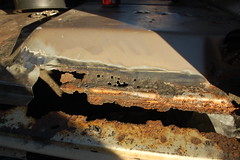
When I bought the ’64 Chevy I knew the worst rot on the truck was in the driver’s rocker area, the whole area was rotted badly enough you couldn’t step there without the whole thing crunching and feeling like it would collapse at any second.
Part of my plan with this truck is to fabricate metal repairs wherever possible, so I could practice metal fabrication, and save money. With the rocker I decided to buy a replacement outer rocker, but fabricate the inner stuff myself.
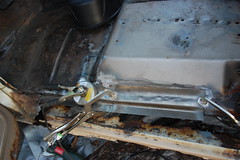
I started by pulling off the sill plate(which was a ruin in and of itself), and made a pass with my Harbor Freight sandblaster to find all the rust holes.
I was left with very little good metal. It quickly became clear that the decorative sill plate had become structural, and was stronger than the remaining rocker.
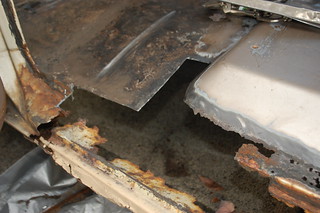
So first I cut back to solid metal, getting rid of all the marginal stuff so I knew I had a solid base to start from.
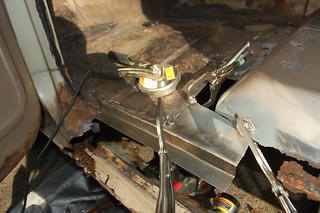
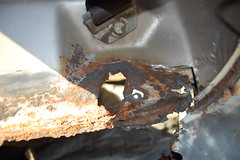
Then came the first of four patches. I formed the right angle bends with the help of a brake, but the rest was hammer formed using whatever around the garage had the shape I needed.
Then it(and the second filler patch) was welded in and ground smooth.
.
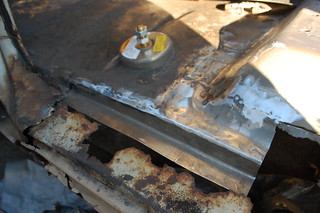
Then the second patch, before and after.
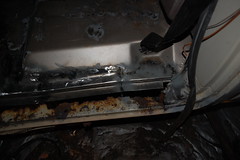
And the third. This patch only got tack welded in before I ran out of light.
Then between Hurricane Sandy & selling the wagon I haven’t gotten back to it. But the floor is already noticeably more solid with just this much completed.
The Iron Guild’s Halloween iron pour
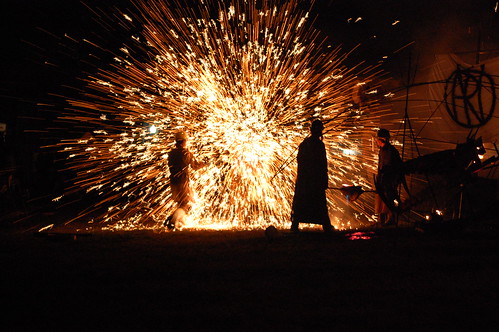
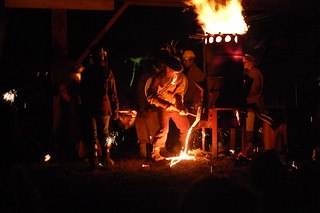
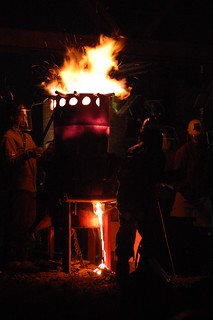
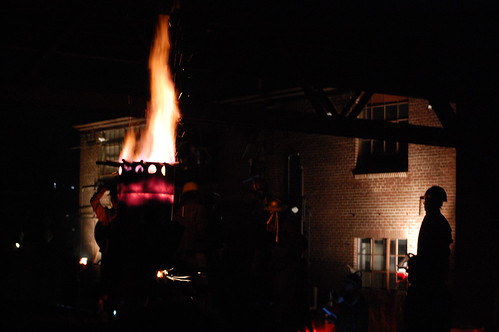
Every year the Iron Guild does an “Iron Pour” at The Steelyard here in Providence. I’ve managed to make it a few times, and it has always been an awesome event.
They set up a couple furnaces, as well as props or molds relevant to that year’s story. This year the story was a group of vikings battling a dragon. There is also music, either live or pre-recorded, to go with the event.
I’ll be honest though, as great as the story concepts are, they aren’t the best part. The best part is just people doing insane things with molten metal.

Pouring molds is a tiny part of it. They splash it around, fling globs of it at metal cutouts of men, pour it into wooden molds, and generally set everything in their arena on fire by the end of it.
And it is amazing. In addition to being really cool and really pretty it also grabs that bit of your brainstem that is still a monkey terrified and fascinated by fire and holds on nice and tight.
This is molten metal, the hard unyielding stuff our modern world is made of. And here, under the gantry cranes of the Steelyard courtyard there are humans playing with it.
And the wagon goes away
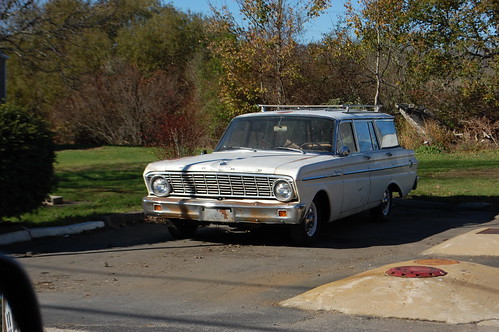
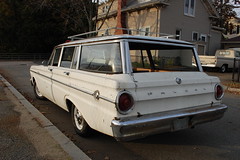
I sold the wagon this weekend. It had been sitting since we bought the house, and I had no enthusiasm to work on it any more. I finally got tired enough of it taking up a garage space for no reason. So it went up on Craigslist and the first person who actually came out to look at it bought it. 
He owns a small gas station and is thinking of getting it logoed up like and old service car. Whatever he does with it, it’ll be getting used instead of just sitting taking up space I don’t really have.
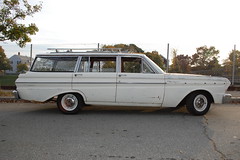 I will miss the wagon, it looked really cool, and on the few occasions when I could drive it it was a lot of fun. But those times were too far and few between and I simply don’t have the money it needed to be made more reliable nor the space to store it until I had that money.
 I lost money on it, but then I always lose money on cars I own. I did get enough back out of it to not feel like I got completely screwed. And I’ve already used some of the money to buy things I need for the truck. I’ve got some patch panels, new mirrors and a few other things being shipped to me right now. This past weekend I went to a flea market and found some custom tail lights and a few other pieces.
 Also I’ve now got a garage space to put the truck in, so I can work on it without worrying as much about the weather, and our driveway is less cramped. So in the end it was a good thing, but I’m still going to be a bit sad that it is gone.

