Fender work

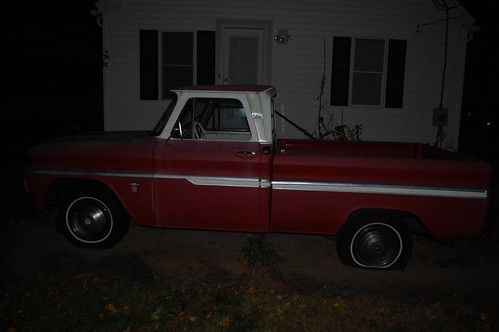
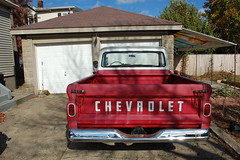
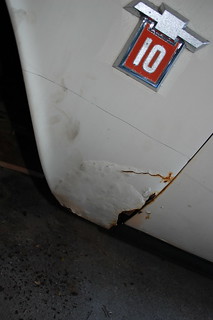
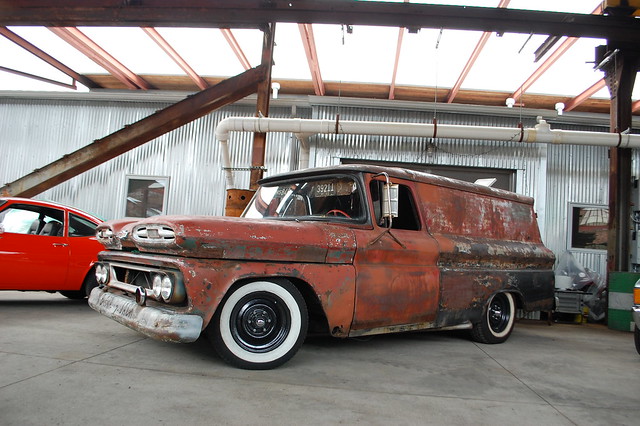
I finally decided to get back to doing some rust work on the truck. I haven’t yet figured out how to fabricate the inner rocker, so I decided to work on the rot in the fenders first.

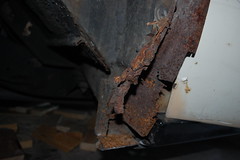
I cut the bottom of the fender off, only to discover the inner bracket was rotted out and a prior owner had done some hack repair work. All the original bracketry for attaching the fender was cut out and not replaced properly The fender was actually welded to the cab.


Now I have an entirely new problem to deal with. I have to decide whether to buy all the patch panels to fix the cab mounts & fender bracket which would cost about $250. The other option is to fab it all from scratch, or only buy part and fab the rest. I’m going to have to do more thinking on this.


Instant Upgrade? Just add Seat

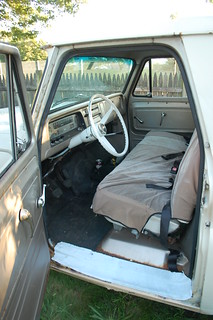
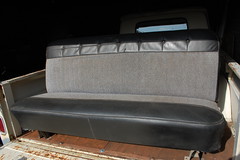
The seat in the ’64 Chevy was a disaster area, and made the cab look like it had been a home to wolverines with a 2-pack a day habit.

It was torn, paint splattered, and yellowed with nicotine stains. And it was covered with a cheap ill-fitting cover that came off every time you climbed in.

A factory-correct replacement seat cover was $150 + shipping and that wouldn’t fix the battered foam. A local upholstery shop gave me a quote of $250 to completely re-upholster it, but that would be in plain vinyl that would be pretty boring looking.


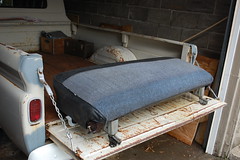
I was surfing the list that is Craig’s one day when I found this bench seat for sale for all of $100. It is from a similar truck but had been custom upholstered. The seller was replacing it with some bucket seats. It was in perfect condition aside from one minor tear in the piping.


I power-washed the whole thing to get the grime out of all the nooks & crannies. It turns out the tweed portions were once blue, but had faded to the current grey(which I’m ok with, as I prefer the grey). I also painted the brackets on the sides while it was apart.


After installing the seat I was amazed at how much it changed the interior. With no other changes but the seat the cab now looks respectable with a bit of patina.

Tool Boxing Day

One thing the truck is sorely lacking is storage space. Putting stuff under the seat is a recipe for being smacked in the ankles under emergency braking. I had an old crate in the bed to hold various ratchet straps, bungee cords, tarps, etc. The problem was it would slide around when driving, and everything got soaking wet in the rain.
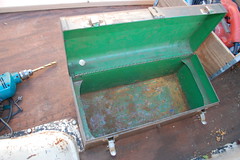
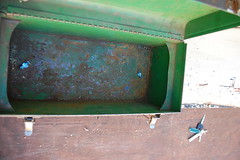
I bought this tool box at the flea market for all of $5, I liked its design, and the somewhat battered look suits the look of the truck quite well. I knew it would stop the getting wet problem, but I needed it to both not slide around, and to make it a little harder for someone to steal it.


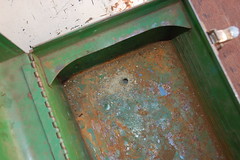
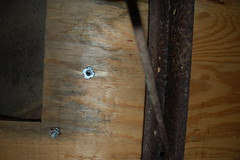
I bought two wing screws(like wingnuts, but screws, I didn’t know this existed before I found them) and some nut inserts for wood. Then I figured out where I wanted the tool box to be(making sure to position it so the lid could open), and drilled two holes through the bottom of the and through the wood of the truck bed.


From below I hammered in the nut inserts, I went from below so they wouldn’t just get yanked out if someone tried to pull the tool box up. Turns out I didn’t get the holes completely straight which made getting the inserts to stay properly was a pain.


Finally the wing screws were installed. Now the tool box won’t be sliding around, but if I need to remove it, it should only take a moment to remove the wing screws and lift the whole thing out.

You made a what out of a what?

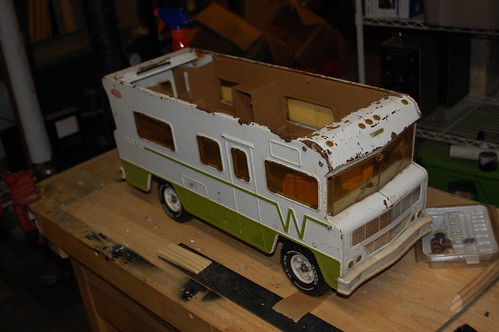
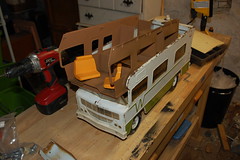
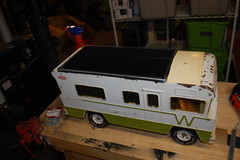
I bought this Tonka Winnebago at a flea market a few years ago for $5. I’d found out about these things after running across a thread where someone made it into an R/C car/tool box/tow vehicle for his other R/C cars. I really liked the battered look of this one, but didn’t know what to do with it, so it went into storage.

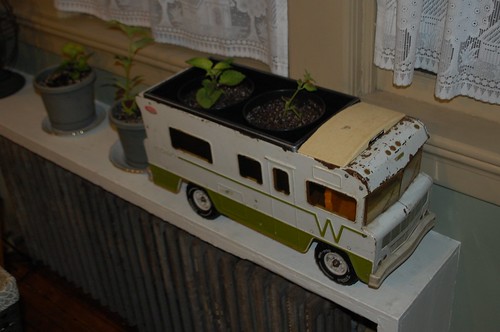
After moving it twice, I was looking at it again and decided I needed to either do something with it, or get rid of it. I’ve wanted to display it, but it takes up so much room, and the lid was broken. I then had a brain wave and decided to turn it into a planter for my g/f’s ever-increasing plant collection.


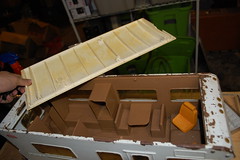
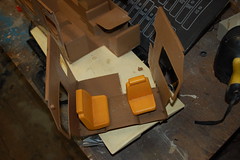
After measuring the roof opening, I was able to locate an appropriately sized planter, and went to work. With the header over the windshield unscrewed, the entire interior comes out easily. Without it, I understood why that guy had turned it into a toolbox, there is a ton of room inside.


Next I sawed off the front of the interior, I needed the back gone to fit the planter, but this way I still had the front seats. I’m keeping an eye out for some appropriate action figures to put here. I also measured & cut down the roof as well.


A sheet metal screw was added to hold the partial interior in place, and glue for the roof bit. Lastly I bent & cut the old roof prop-rod to serve as a brake for the wheels. It wedges into the spokes inside the wheels and keeps it from rolling around and dumping itself an a bunch of plants on the floor.


All that was left then was to drop the planter tub in place and call it done. I got lucky and found one at Home Depot that was exactly the right width. The planter isn’t secured in as I wanted it to be removable for watering or repotting. It should be ok supported on the edges, but if it looks like it is sagging when filled with dirt I’ll add some wood blocks inside the winne to support the bottom.

All told it was a quick fun little project that let me do something useful and fun with something that was otherwise sitting in storage collecting dust. Plus now our living room looks that extra bit sillier.


They aren’t kidding about this thing hauling.

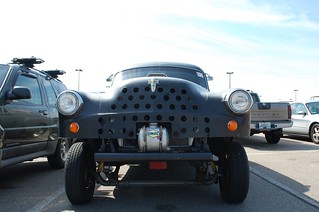
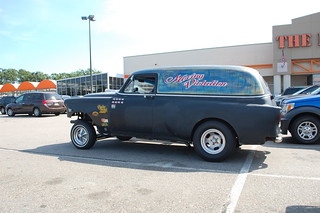
I ran across this 1953 Chevy sedan delivery at Home Depot while picking up house supplies. Just as I was entering the store this burbled through the parking lot. I dashed around getting my shopping done as fast as possible in hopes it would still be there when I was done.


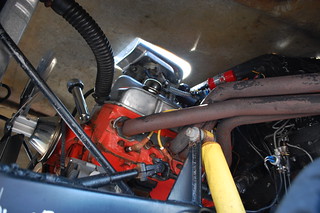
Luck was with me, and it it was still there, parked a few spaces away from where I’d left my truck. “Moving Violation” seems to have been built in the classic 60’s gasser style with a straight-axle front pointing at the sky, big slicks in the back, and a worked over V8 under the 1-piece flip-front hood.


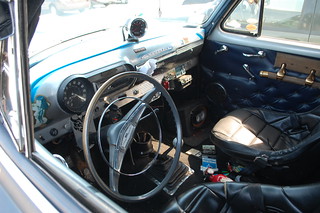
The car was rough around every edge, but had the look of something that gets driven, and driven hard. And the very fact it was driven to Home Depot of a Saturday was awesome in my book.


I spent a good long time looking the car over and admiring all the details through out. It was clear the car was well-loved and built by someone with a sense of humor. But the best part was the large sticker on the rear window, which made it clear how the owner feels about people giving him shit for the car not being perfect.


Whoops!

Had a bit of an accident this weekend.

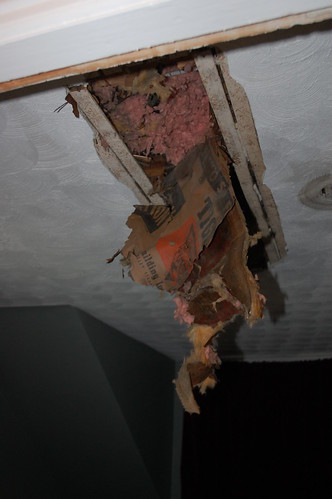
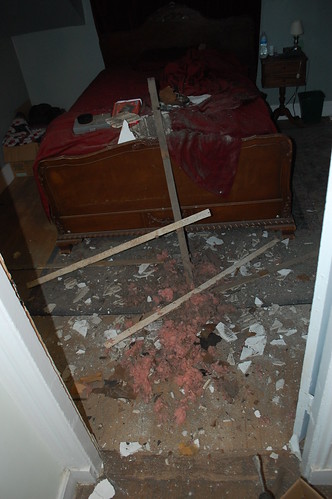
I was continuing the epic job of rewiring the house and removing the ancient knob & tube wiring. Saturday found me in the 110+ degree unfinished attic digging through ancient insulation to find and trace the circuits for the second floor lights & plugs. I was balancing on the ceiling joist and a collection of old boards when I mis-stepped and put my foot through the ceiling of my bedroom.

Fortunately I caught myself before all of me went though the ceiling, but I was still left with a 10″ x 48″ hole with the plaster spalled off around it.

And where it all that plaster, lath, nails, dust, dirt and ancient insulation end up? Why on the bed & carpet of my bedroom of course.

As frustrating as it was to have just messed up like this, the worst parts was I still had a bunch of half-wired circuits and hacked up old wiring in the attic. So I had to ignore what I’d done and keep working up there so I’d have the lights and working plugs needed to be able to clean this up.

I don’t have photos, but as of now there are nice new lights in the upstairs bathroom & my bedroom, the one in the bathroom now even has a switch instead of a pull-cord.

The hole now has a piece of drywall screwed over it, and will eventually be re-plastered(when I feel like plastering over my head and wearing half of it).

Box’s new look

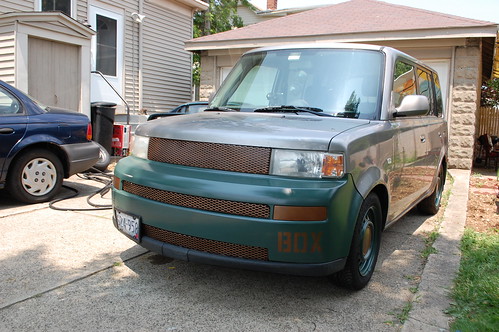
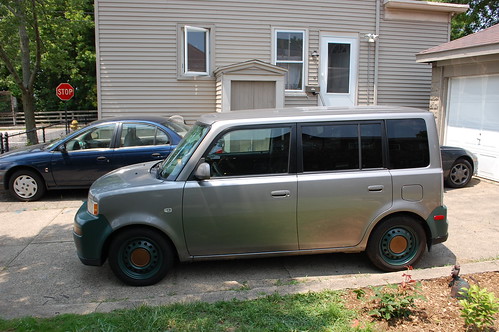
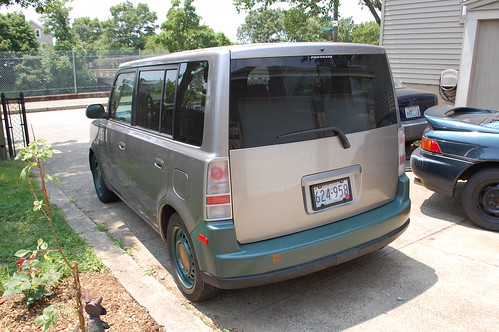
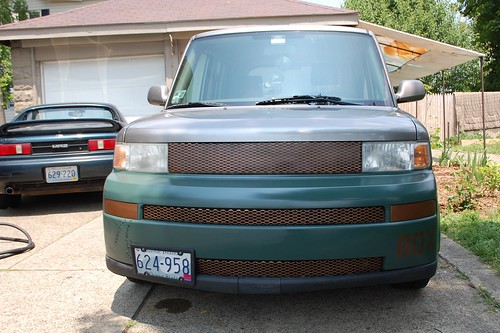
Box recently got a makeover. He needed some attention, so I decided to have fun with him.

I was tired of the battered bumpers, which had suffered greatly through the last winter. They were cracked and scraped and the lower lips(which I never liked) were half-destroyed. In addition the custom aluminum grilles had started to corrode, and the wheel paint I’d done four years ago was getting worn & tired.


So off came the bumpers & wheels. I’d been buying up 90’s Jetta front lips as I found them at junkyard, with a plan to use them to make new lower bumper lips that were about half as low as the factory ones. I’d tried just removing the factory lips, but the bumpers looked unfinished, it was obvious there should be a lower lip on them.

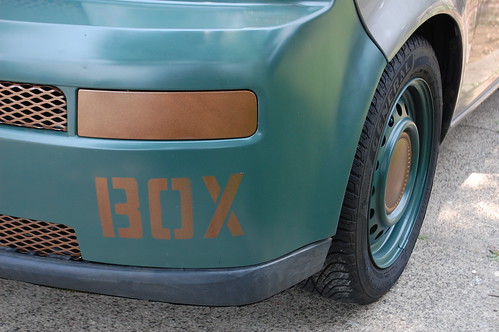
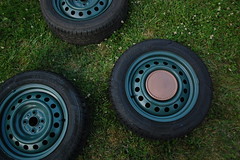
First up was the wheels. I scuffed them and painted them with some Rustoleum paint. I’d been aiming for a dark hunter green, however the color turned out to be more of a military olive drab. I wasn’t sure at first, but the color has grown on me. The hubcaps got a coat of aged copper.


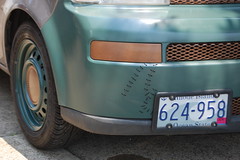
For the bumpers I sanded out the worst of the scratches & chips, and painted them the same green. As the color is a satin rather than a gloss I wasn’t worried about perfection(plus there is no way these bumpers would ever look perfect).


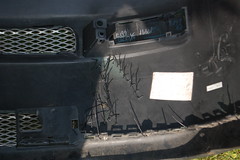
The Jetta lips were obviously not designed to fit  the xB bumpers, so I spent a lot of time cutting & trimming them to match. They are not a perfect match shape wise, but look good in general, and have the right shape to give the bumpers the look I wanted. I also fixed the cracks in the bumper using zip-ties to stitch it back together. I could have used epoxy and made the repair virtually invisible, but this amused me much more.

All total a hundred or so zip-ties were used to put it all back together. The grilles were painted the same aged copper, along with the fog-light covers and the tow hook cover on the rear bumper. Then everything was re-assembled.

I also removed the side skirts, and with a bit of stenciling the project was done.


All together it came out exactly as I’d hoped. I was able to fix several issues that were making box look beat-up, fixed the lips that always bugged me, and made a major change in his overall aesthetic. So I’m calling this a win.

The Steelyard Car Show 2013

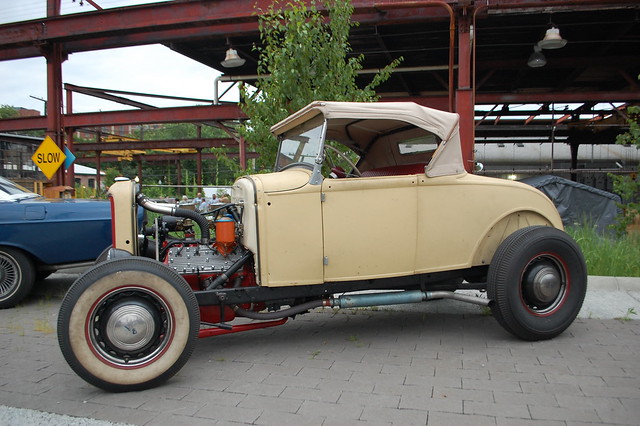
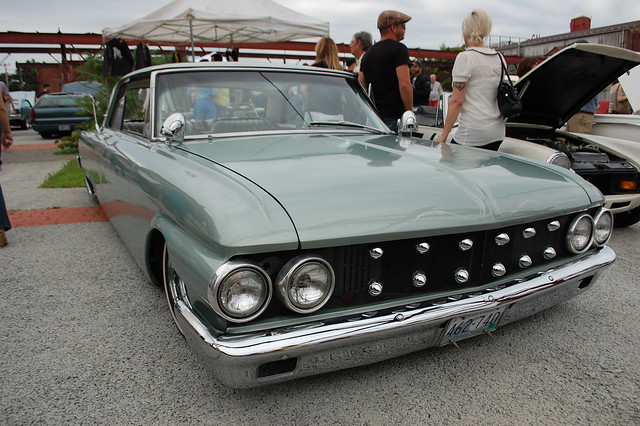
Every year The Steelyard here in Providence puts on a car show, and every year it is filled with amazing cars. The Steelyard also makes an amazing backdrop for these beautiful classics.

A big surprise for me was my old ’62 Comet “Emily” was there(this car is in some of the header images on this blog). The current owner is treating her well and has continued to customize her. It made me nostalgic to see her again, and I was glad she was being treated well.

For more pictures, see my Flickr set from the Show.

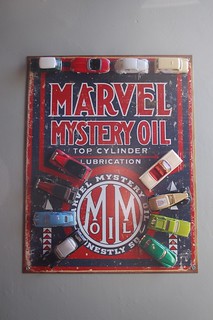
Vertical Matchbox Storage

I have a small collection of 1/64th scale diecast cars. Matchbox, Hot Wheels, Johnny Lightnings and such. They are a random combination of stuff left over from my childhood, and neat stuff I have found since. Storing & displaying them has always been a bit of a pain as I didn’t want them cluttering up bureau or desk space, and I didn’t want to shell out for a storage cabinet as they were fun toys to me, not collector or art objects to be locked away behind glass.


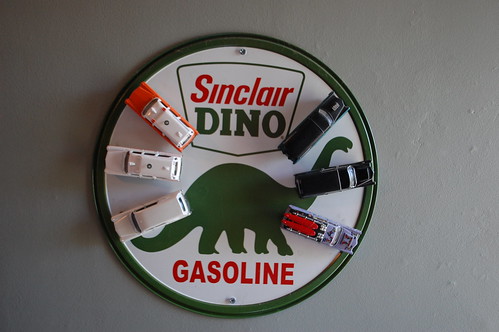
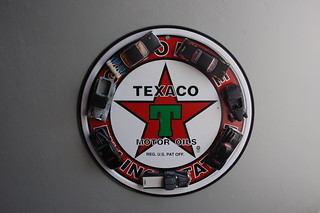
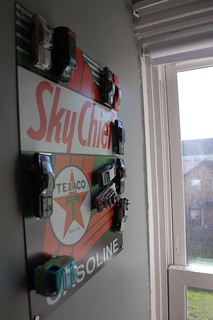
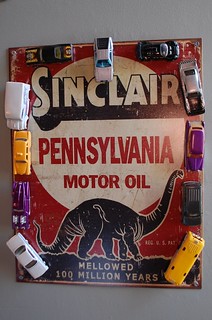
I also love old enameled signs, though they are an expensive enough collectors item now that I only have one real one, the rest are reproductions, which are much more reasonable.

It occurred to me one day that I could combine both me matchbox storage problem and my love of old signs into one solution.


I purchased a few hundred neodymium magnets on ebay to give my idea a try.


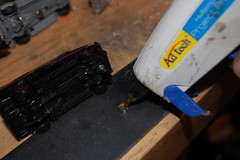
I’ve experimented with a few different sorts of glue, only to find that simple hot glue works best, especially in that if it fails I can easily pull off the old glue and add new without having to worry about residue like with silicon or epoxy.


The easiest way to do this is to stick the magnet on a piece of steel, add a drop of glue, and press the car down onto it. The steel keeps the magnet from shifting until the glue has dried.


The magnets were supposed to be strong enough to hold a car with one magnet, but they tended to both let the car slide down the sign, and the car would rotate around so the heaviest bit pointed down. So I used two magnets per car, one at each end to keep it pointing however I wanted.


The end result is easily reconfigure-able and makes for a fun 3-d wall decoration.


It wouldn’t work well for a child’s room, as the magnets mean the cars no longer roll. However if decoration & display is the primary goal, it works really well.