Project creep, part one

The plan was simple, replace the worn out front suspension with all new parts so that the steering wheel would feel more like it had a say in the direction the wagon went. To that end I ordered a complete rebuild kit that had nearly every piece I needed, and on Saturday started pulling the old parts off.
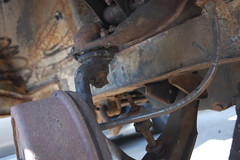
All things considered it came apart surprisingly easily. The tie rods were stuck in place, but after some enthusiastic hammering they popped loose. Compared to other times I did this job this was a cakewalk, no stripped nuts, no rusted in place bolts. Everything came apart with simple hand tools. I spent about 1.5 hours on saturday getting the driver’s side completely removed, and got a good start on the passenger side before having to clean up for a friend’s party.
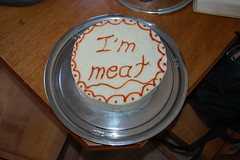
It was an OMGWTFBBQ!!1!, where you’re supposed to bring weird or disturbing food. We brought a meat cake. Two layers of pork & beef meatloaf frosted with mashed potatoes and iced with ketchup.

Yeah, we’re weird.
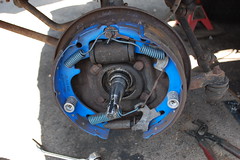
 

Sunday found me back out working on the wagon. One great surprise during all of this was the front brakes. The guy I bought the wagon off of told me he didn’t think his mechanic had touched the brakes, so despite them working well I was already budgeting for a complete brake overhaul. So imagine my surprise when I pulled the drums and found front brakes that looked like brand new.

Everything in here looks like new, the pads have tons of meat on them, and the rubber parts are in great condition. Even if the rest of the system is junk this is $100+ in savings right here. Regardless they were removed for now, and eventually the suspension was stripped down to the bare spindles. The spindles, strut rods & springs are the only parts I am re-using, so they will get cleaned up and repainted before going back on.
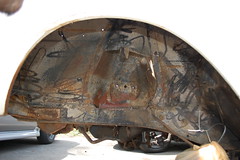
the squiggles are from a quick pressure-washing before I started, turns out pressure washers remove old undercoating

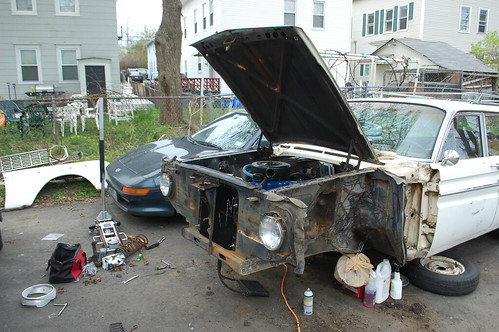
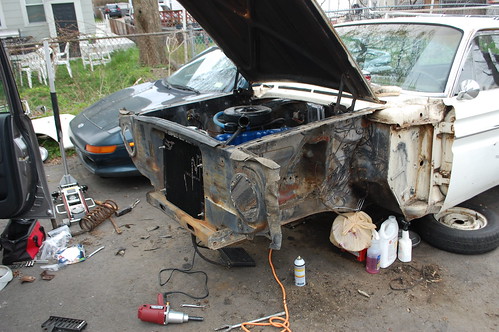
Eventually I was left with two empty wheel wells. I had planned to paint the mounting points for the suspension before re-assembly so I wouldn’t have to take it back apart to paint those later. Looking at the space in the wheelwell I decided it would make even more sense to clean up and paint the entires wheelwell area while the suspension was out of the way. I started cleaning in here, then realized that if I was going to repaint in here, it would be even easier if I cold reach everything.

And so the project creep begins.

Going…
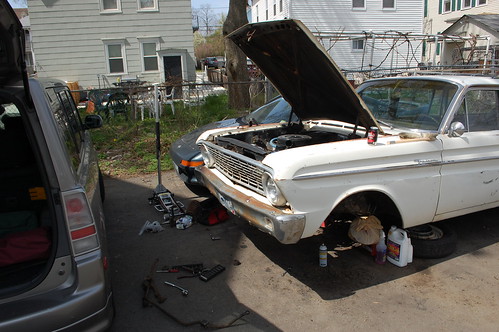
Going…

Gone.

In the next post I start in on the rust cleanup and repainting.

the manifold exhausting attempts to fix the exhaust manifold.

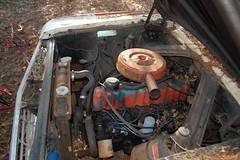
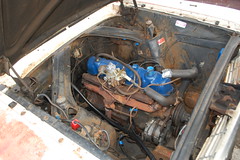
As I have said before, the exhaust manifold on the “new” engine was cracked, so I needed to pull it and swap the good manifold from the old engine. Ford sixes are notorious both for cracked manifolds and for the bolts rust-welding themselves to the head. A fun combination. So in the days leading up I sprayed the bolts with PB Blaster and Freeze Off. Once I started in I used a bolt extractor to get a grip on the badly rusted heads.

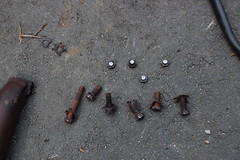
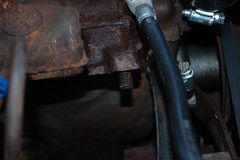
End result was six bolts actually coming loose, four snapped off bolt heads and one bolt who’s head stripped badly without shifting. I spent the next while trying to shift the stubborn bolt, I tried the bolt extractor, vise-grips, welding a nut onto the head and probably a half-dozen other things without the slightest sign of movement.


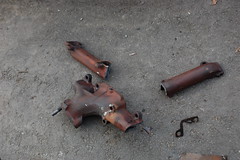
I finally gave up and cut the head off with an angle grinder, and pried the manifold off in pieces. The places it snapped in the pic are not where the cracks were, but just the result of overly enthusiastic prying. Fortunately I didn’t need this piece anymore. Frustratingly, the bolt that had given me so much hassle and wasted so much time, once the manifold was off it came out in moments with a pair of vise-grips.

Once the manifold was off I still had the problem of the four bolts that had snapped off. I was lucky in that they hadn’t snapped off flush, but I still couldn’t budget them. Vise grips would just chew them up, and attempts to heat or freeze them didn’t do a thing. I even tried welding a nut to them and putting a wrench on it. All I did was snap the nut back off.

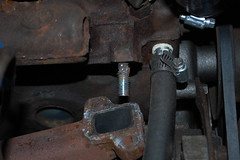
Finally I gave in and decided that if the bolt wanted to be a permanent part of the head, I would take advantage of that instead of fighting it. So I cut the bolt back about half way with an angle grinder to get a flat surface. Next I cut the heads off some short bolts and chamfered the ends to give my weld someplace to bite.


Then one by one I welded the new bolts to the old once, effectively creating a stud I could put a washer & nut on. Because I was working down in the engine bay I had no good way to get the pieces aligned perfectly straight. So after welding each one I had to grind the welds down and test fit the manifold. I was lucky in that they all ended up straight enough to allow the manifold to slide on and off easily.

Add some stainless steel hardware & a new manifold gasket and the project was done.

Admin notice

This is a warning that I have put an offer in on a house, and as such the house and associate stress is eating my head. So if I miss a weekly update or am late please understand that this is why.

Usually I write 1-3 entries at a time, so hopefully there won’t be a lot of disruptions, but I can make no promises.

Engine swap, woefully under-photographed.

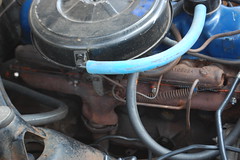
As I mentioned in the last entry about the wagon, the engine had violently overheated while trying to drive the Falcon to work. Since I already had a spare engine for it waiting, I filled the radiator with water, cut & re-routed the heater hoses to take the now blown heater core out of the circuit, and limped her home, staying off the highway. On the way home I stopped and rented an engine hoist, & loaded it in the back.

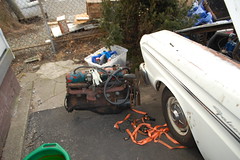
While it had been bright & warm when I left work at noon, by the time I got home at 1:30 it had remembered it was early February and gotten cold & grey, with erratic drizzle. However I was already going to have to pay for the engine hoist so I pushed on with the swap anyway. You can see however why taking photos was not my priority.

I started disconnecting things, sawing off radiator hoses and generally swearing up a storm. After about an hour I had the motor disconnected to the point where I could start actually pulling. Ford sixes have no good place to hook up chains to yank them, ,so I ended up using two ratchet straps from my trailer to form slings front & rear. With my girlfriend manning the engine hoist I pushed pulled, pried & kicked the engine free of the transmission and guided it out of the engine bay & down to the pavement.

Once the old lump had been pried free, there was a bit of jockeying engine hoist & straps to get the “new” engine secured. Then that was lifted, swung around, and dropped into place.

Ok, that last sentence is technically correct, however what it leaves out is the 1.5 hours that it took pulling, prying, levering, shoving, swearing, bashing, cursing, praying, etc. to get the engine & transmission to line up and slide together. I hate putting engines in when the transmission is already in place, and doing in a cold driveway while being drizzled on does not improve the experience.

Once the engine was in place and bolted to the transmission and frame, the engine hoist was disassembled & loaded into Box to be returned and I went upstairs to shower off. Over the next few weeks the cold weather hung around, and once it started to lift my work went on insane amounts of mandatory overtime. So the wagon sat with the engine in place but other wise unattached for almost a month before I could carve out some time to start reconnecting everything. Most of it went smoothly, and with few surprises. I couldn’t help but be amused to use guides I had written up myself to rewire the car for an alternator & modify the radiator support to fix an thicker radiator. The only issue I had was swapping out the cracked exhaust manifold for the good one from the old engine. That was enough of a project to warrant it’s own blog post, so that will be coming soon.